Evaluating the Best Underwater Lighting Techniques
- Understanding different underwater lighting techniques is crucial for capturing stunning photos.
- Natural light can be supplemented with artificial sources to enhance images.
- Choosing the right technique depends on the depth, environment, and subject matter.
- Experimentation and practice improve underwater photography skills.
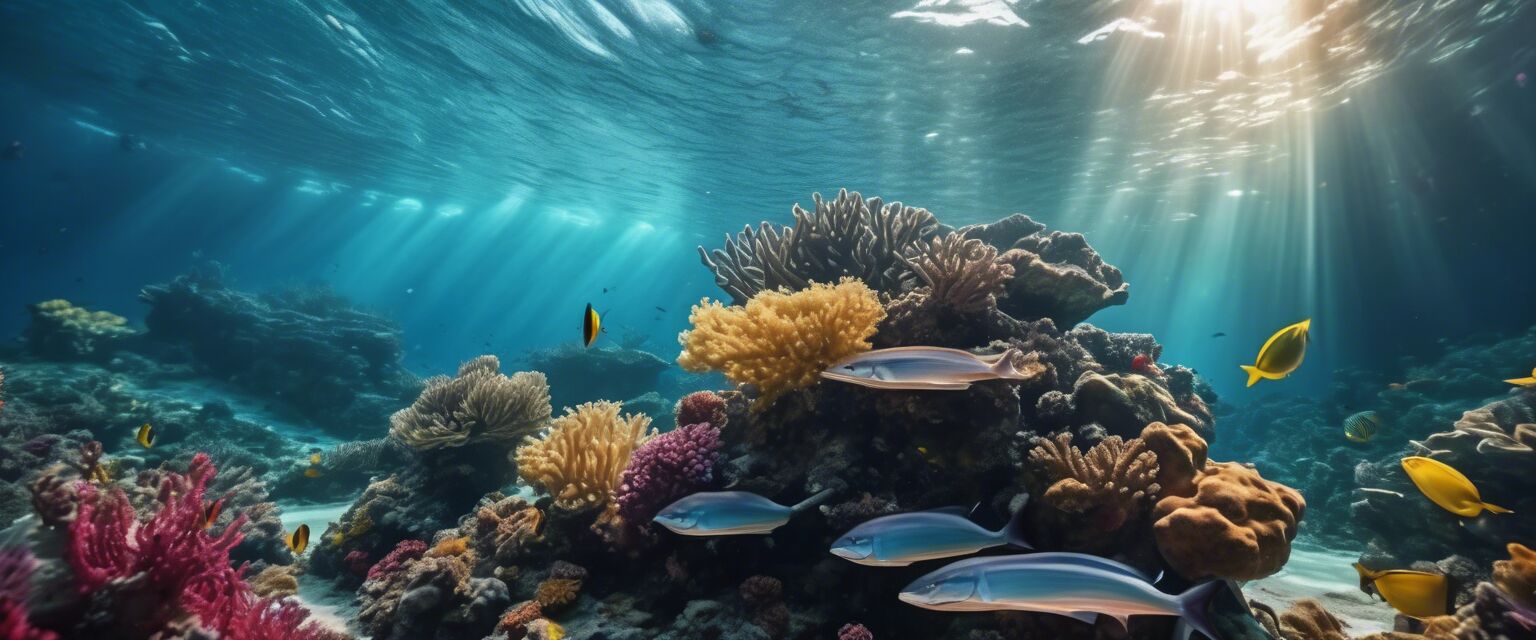
Underwater photography presents a unique set of challenges and exciting opportunities to capture the beauty of the ocean. One of the most significant aspects of this art form is mastering lighting techniques to ensure that your photos represent the true colors and details of underwater life. In this guide, we will review various underwater lighting techniques, their advantages, and how to effectively implement them for stunning results.
Understanding Underwater Lighting Techniques
Lighting is critical for underwater photography as water absorbs light and alters colors at different depths. Understanding how to effectively use both natural and artificial lighting can significantly enhance your underwater photographs.
Natural Light
Natural light is the primary source of illumination for many underwater photographers. However, it diminishes rapidly with depth. Here are some tips for leveraging natural light:
- Timing: Shoot during midday when the sun is at its highest for optimal brightness.
- Angles: Position yourself to utilize the sun’s rays directly or at a slight angle.
- Close-up shots: The closer you are to your subject, the better the light will be.
Artificial Lighting
Artificial lights can be used to supplement or enhance underwater shots. Here are several types of artificial lighting techniques:
| Lighting Type | Best Use | Advantages |
|---|---|---|
| Strobe Lights | Close-up photography | Provides bright, short bursts of light to eliminate backscatter. |
| Video Lights | Wide-angle photography | Constant illumination that helps in capturing moving subjects. |
| Handheld Lights | Flexible and dynamic shooting | Easy to maneuver and adjust as per the shooting needs. |
Techniques to Enhance Light Utilization
Combining different lighting techniques will allow for much more creative underwater photography. Here are some advanced tactics to maximize your lighting:
- Using Halos: Creating a soft halo effect around your subject helps create depth and dimension.
- Multiple Sources: Using multiple light sources can help reduce shadows and enhance the overall image quality.
- Adjust White Balance: Manually adjusting your camera’s white balance setting can help correct color distortions caused by water.
Tips for Effective Underwater Lighting
Beginner Tips for Underwater Photography Lighting
- Always check the battery life of your artificial lights before diving.
- Practice taking photos with different lighting angles to see what works best.
- Consider using a red filter for deeper dives to counteract color loss.
Depth Considerations
Depending on how deep you dive, the visibility and the light available can significantly change. Here's a breakdown of light performance at different depths:
| Depth | Light Color Loss | Recommended Technique |
|---|---|---|
| 0-10 meters | Little to none | Natural light with some strobe usage |
| 10-20 meters | Reds and yellows diminish | Artificial lights recommended |
| 20+ meters | Significant loss of color | Powerful video lights or multiple strobes |
Conclusion
Mastering underwater lighting techniques can make a dramatic difference in your underwater photography results. By learning to understand both natural and artificial lighting sources, and experimenting with different techniques, you will improve your ability to capture breathtaking underwater images. For more information on other underwater photography gear, check out our sections on underwater lighting or underwater cameras, and escalate your photography to new depths.
Pros
- Enhances color and detail in underwater images.
- Allows for more creativity and dynamic compositions.
- Improves visibility and reduces shadows.
Cons
- Learning curve to master different techniques.
- Additional gear may be required, increasing costs.
- Can be challenging to manage at depth.